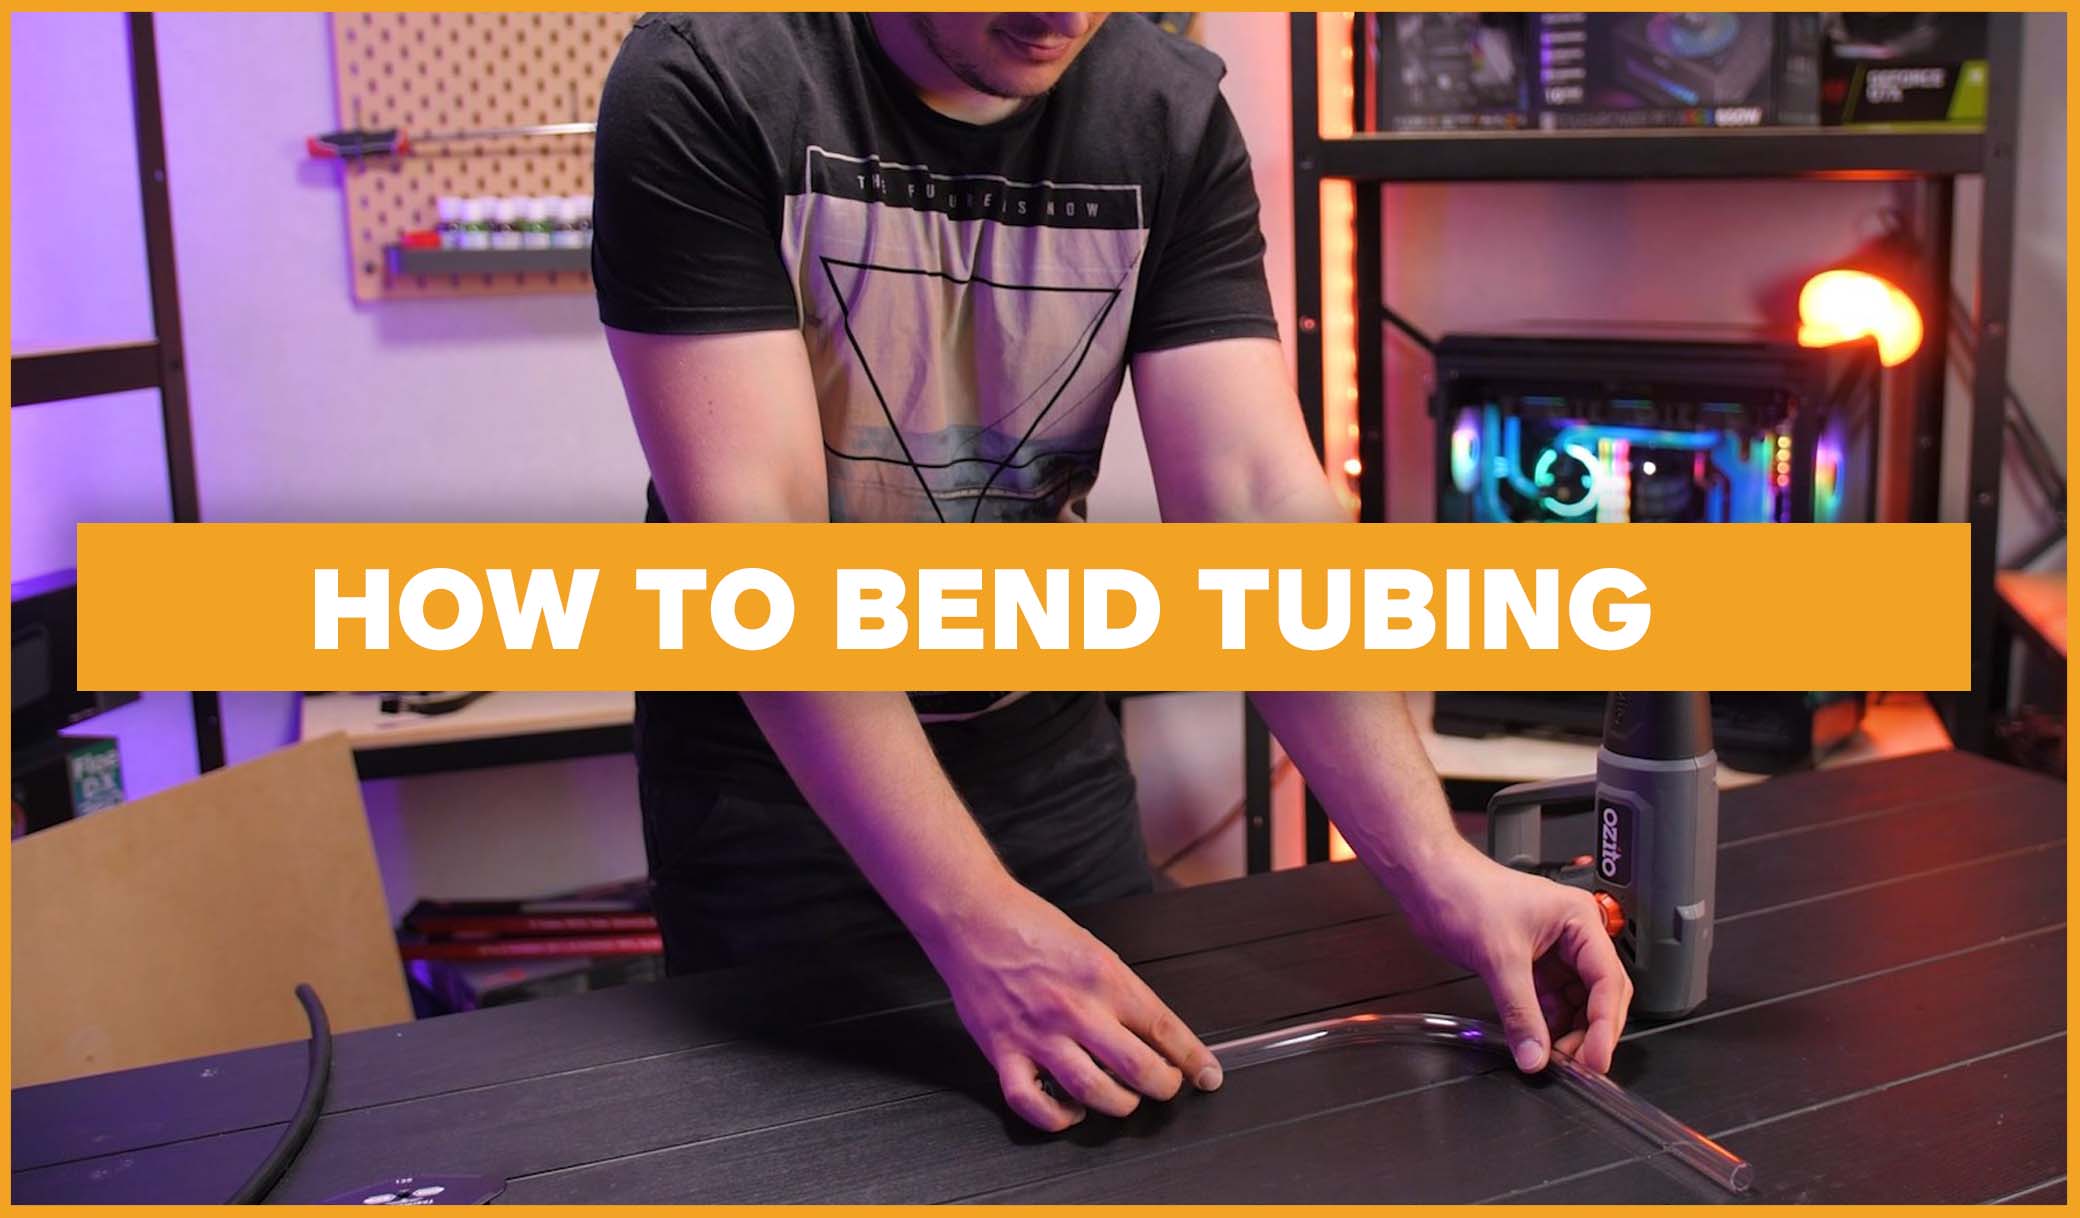
If you want to get into custom water cooling, learning how to bend tubes properly is essential! The consequences for not doing so can be very grim for your system. So, here is a step by step guide on how to bend PETG tubing, with some added guidance from our PC builder, Nick.
TUBE TYPES
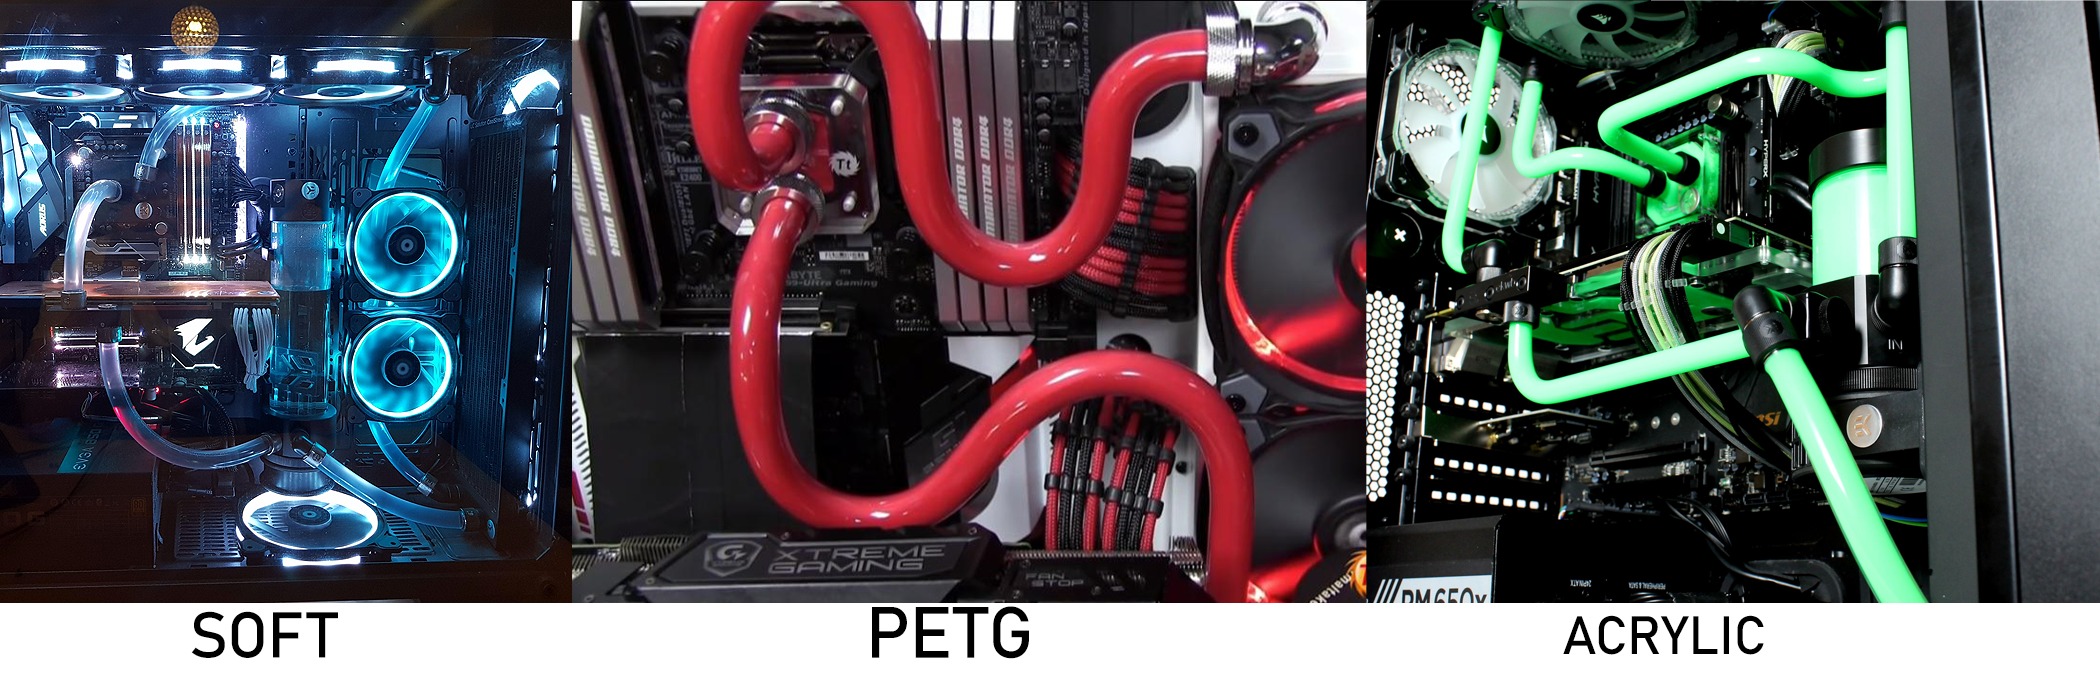
First, it’s important to understand the types of tubing. This means you can make an informed choice of which tubing to go with. There are 3 main types of tubing you can use for a water-cooled build. The first, is soft tubing. This is probably the easiest tube to use as you don’t have to worry about bending it, and you can cut it down easily with a pair of scissors. This tubing has gone out of popularity recently though, due to people not finding it as aesthetically pleasing.
Next is rigid tubing, coming in both PETG and Acrylic. This type of tubing uses different fittings than the soft tubing. Acrylic is quite brittle, and if you hit it against the edge of a table, for example, it would shatter. You will also need a saw to cut it, as smaller rotary cutters aren’t strong enough. Acrylic tubes can pair with practically any coolant though, and is super heat resistant.
For this How-to though, we will be using the other type of rigid tubing, PETG. The most common tubing in water cooling today, PETG bends at a lower temperature, so you don’t have to heat it up for as long. You can also cut this using a rotary cutter. It’s so durable though, that unlike acrylic, you can smash it against the edge of the table, and it won’t shatter. Here at Thermaltake we have 2 different lengths of PETG tubing available, 1m and 500mm. The size of your case and the layout of parts will determine the size you should pick, so a bigger case will usually need longer tubes.
 TUBING TOOLS
There is also an array of tools that you use when bending tubes.
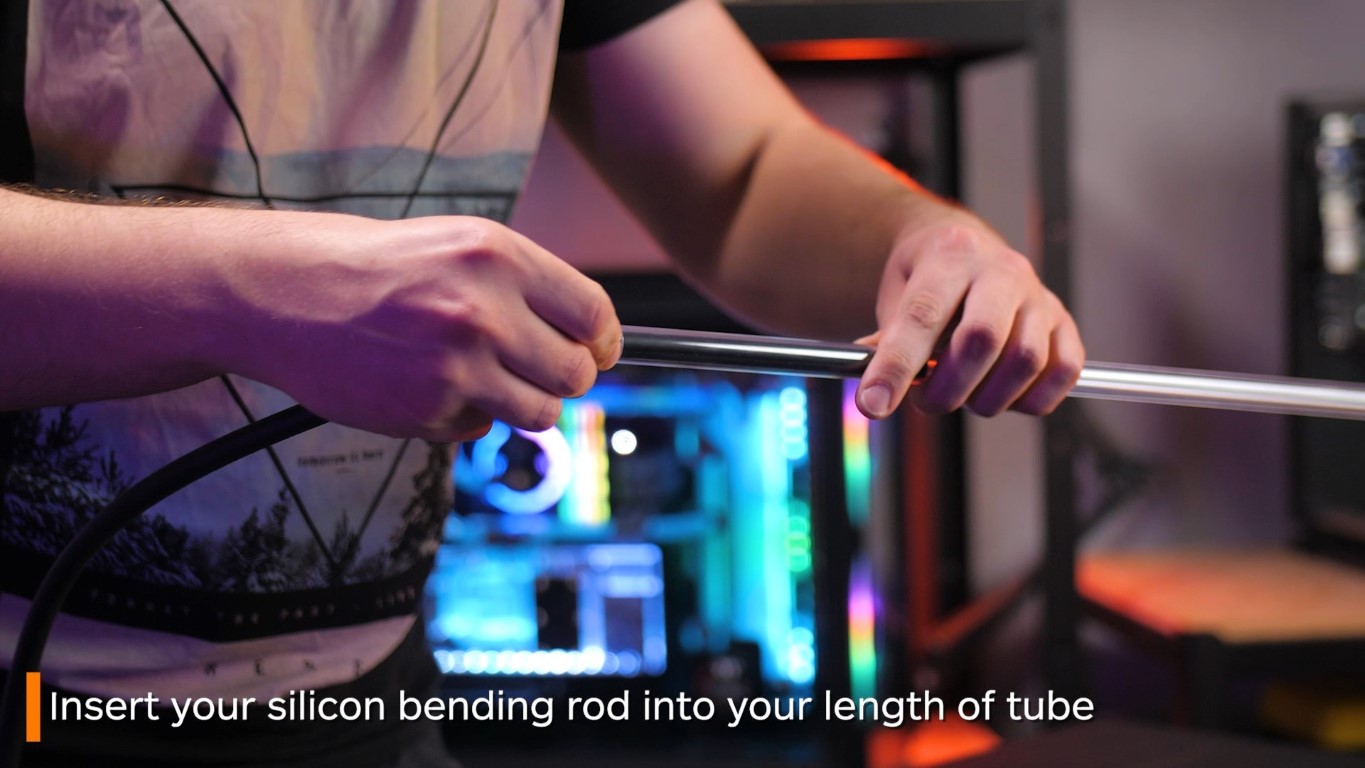
The first is a silicon bending rod. This is a vital tool when tube bending. You insert this inside the tube you want to bend before heating it. If you don’t do this, the tube will pinch shut and be unusable. If you then try and use this is in your system, it will kill your flow completely.
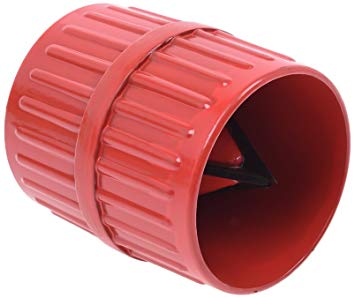
The second tool is the reaming tool. This has two sides. One is for shaving the edge of the tubing down to a 45-degree angle. This is so you can put the tubing into your fittings and there will be no risk of tearing any of the O-Rings. The other side is to sand down all the plastic on the edges after cutting the tubing.
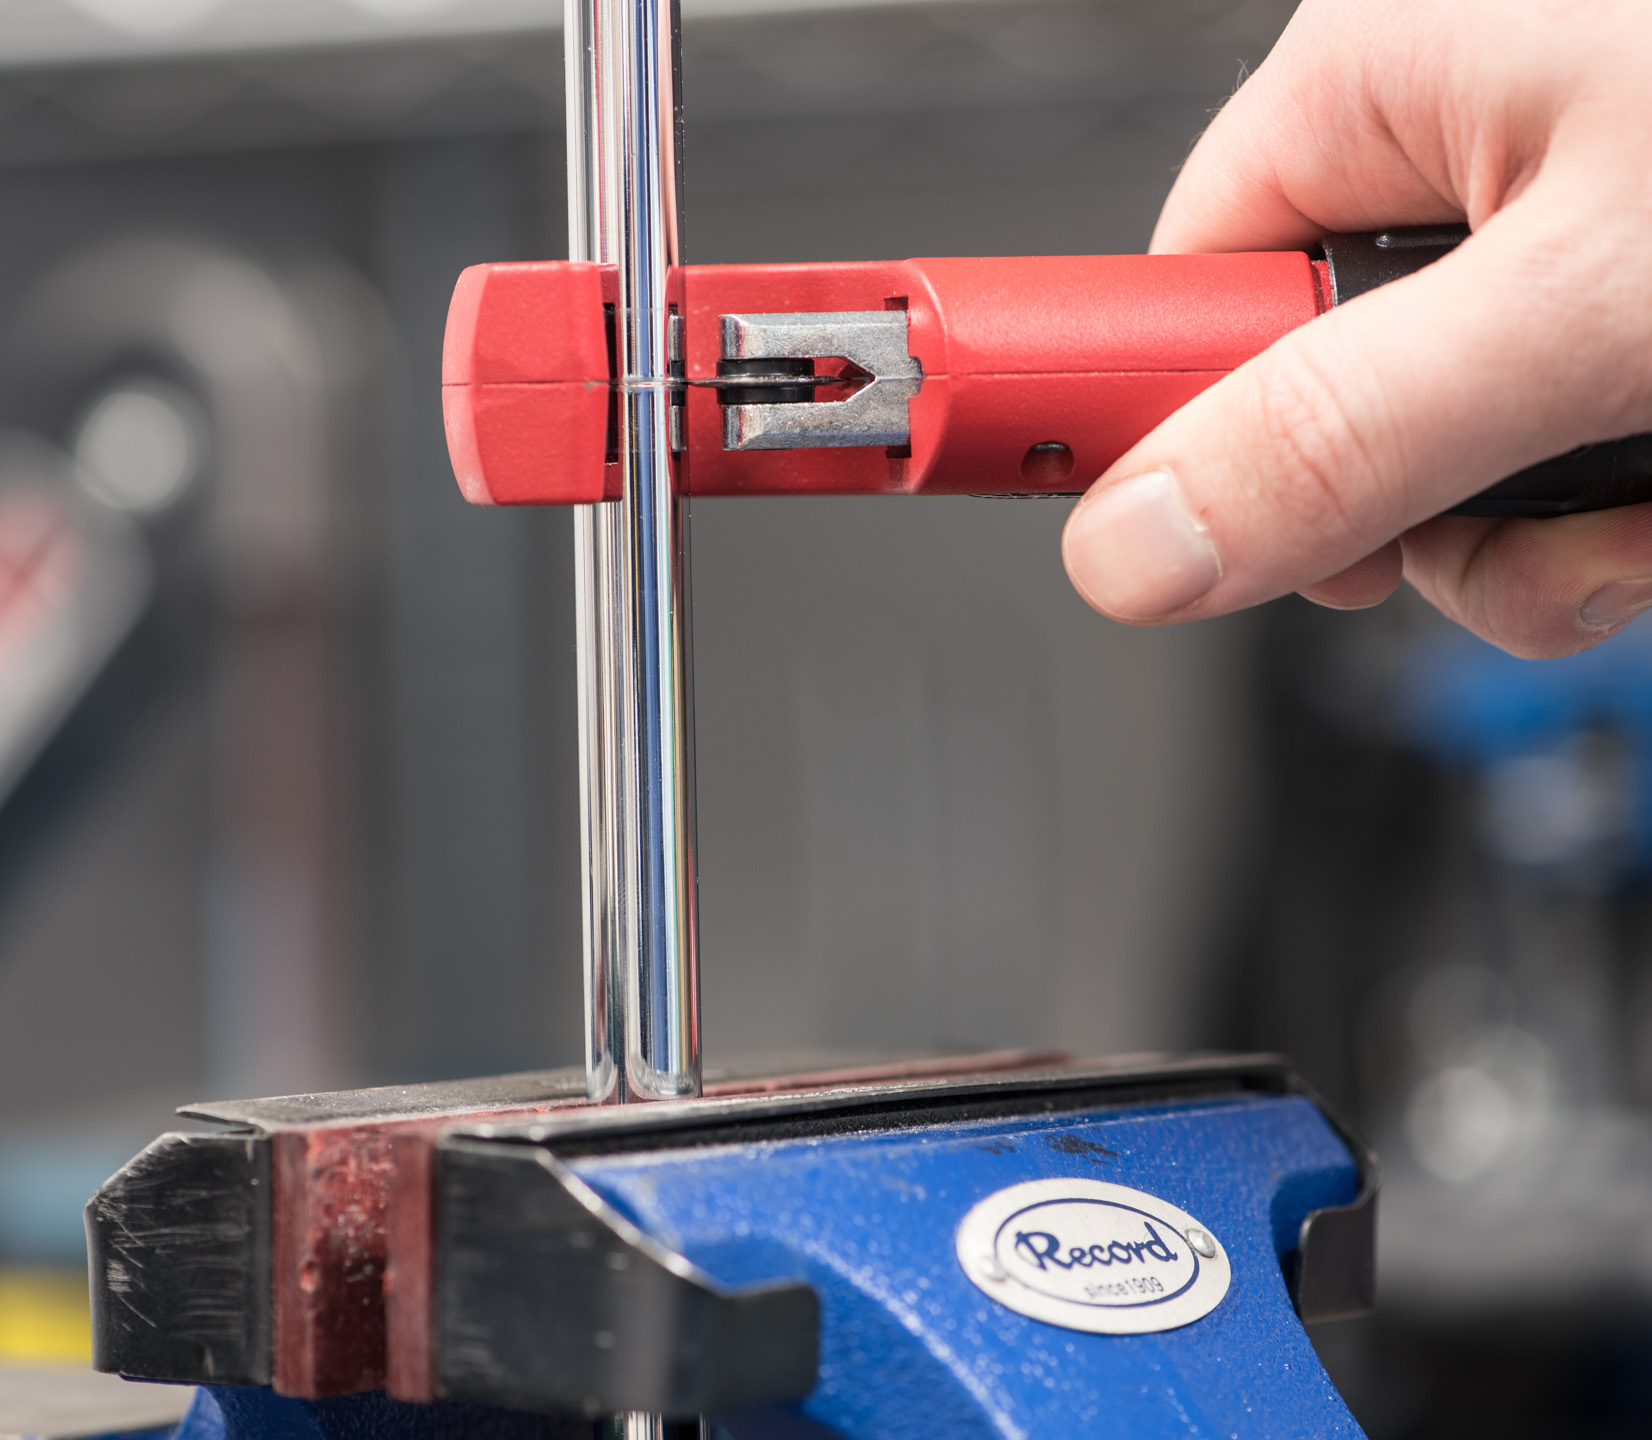
There is also a rotary cutter, which is a small device used specifically to cut PETG tubing.
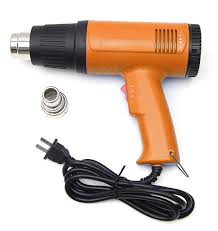
Next is your heat gun, another vital tool in tube bending. This is for heating up the tubing until it become malleable enough to bend. Heat wise, PETG tubing begins to get malleable at around 62 degrees Celsius, and melts at 260 degrees Celsius. Messing around with different temperatures and moving the tube further away or closer to the heat is a great way to figure out the best temperature for you. It’s always better to start at a lower temperature first, and work your way up. The worse thing that’s gonna happen if your heat is too low is your tube doesn’t bend, but if it’s too high then you can quickly burn your tubing.
You can also use heat resistant gloves if you are concerned about the heat hurting your hands.

Your final tool, is mandrels. They ensure consistent angles when bending. Mandrels are available in 4 different angles, to ensure all the sorts of bends you want to make are covered. To ensure they don’t slide around while waiting for your tubing to cool, you can also screw these down to a flat surface.
 PROCESS
1. Firstly, you insert the silicon bending rod into your PETG tubing.
 2. Then start up your heat gun, and hold the tubing over the heat, not too close but not too far away. Twist the tube around constantly, to make sure the tube gets heated equally. Also ensure you’re heating up a significant section of the tube. If you only heat up a smaller section, when you go to bend it there might be a risk of kinking because there is not enough area for it to bend around. Best way to determine how much to heat up is decide where you want your bend to be and ensure you’re heating up around 10 to 15 cm on either side of that. Don’t worry if it seems like you’re heating up a lot of the tube though. You can’t really heat up too much of the tube, but you can heat up too little!
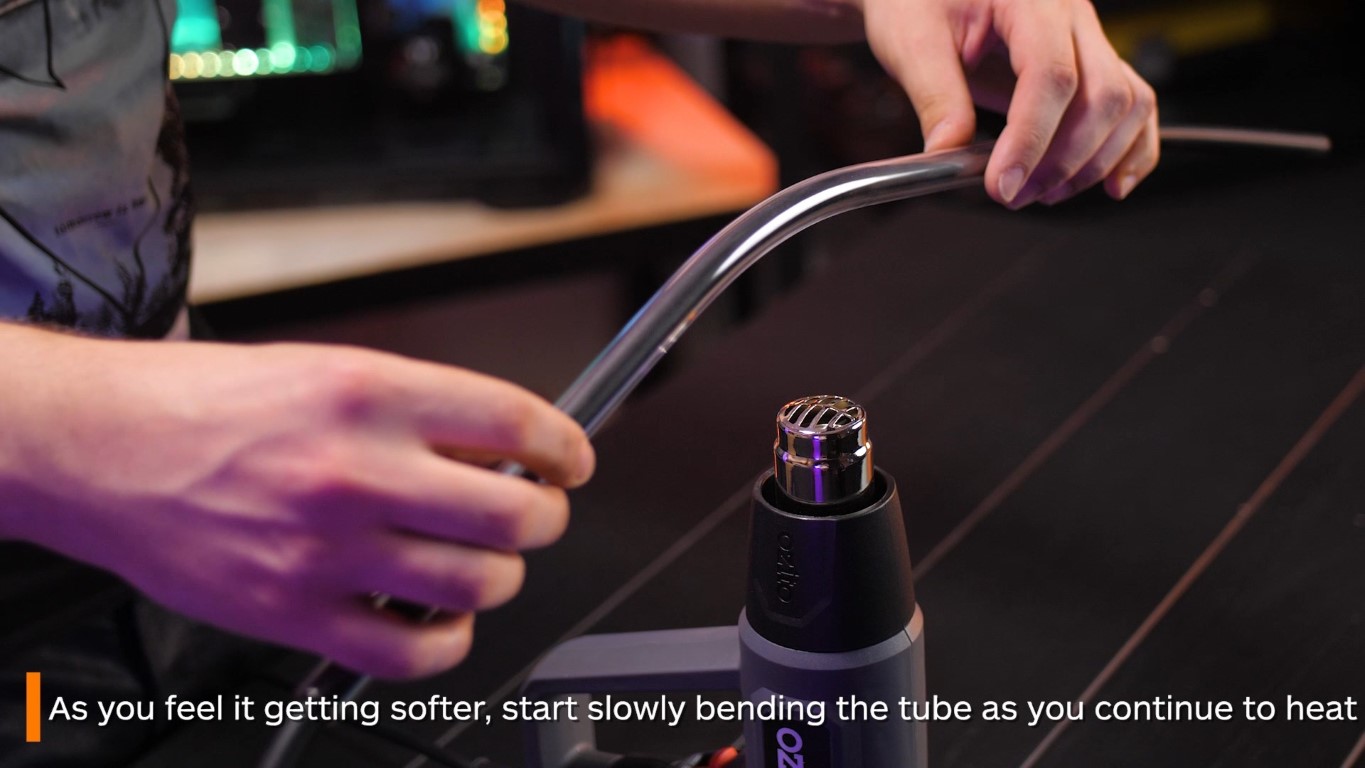
3. You want to hold it over the heat until it starts feeling malleable enough to bend. It may take around 2 minutes depending on how hot the heat gun is.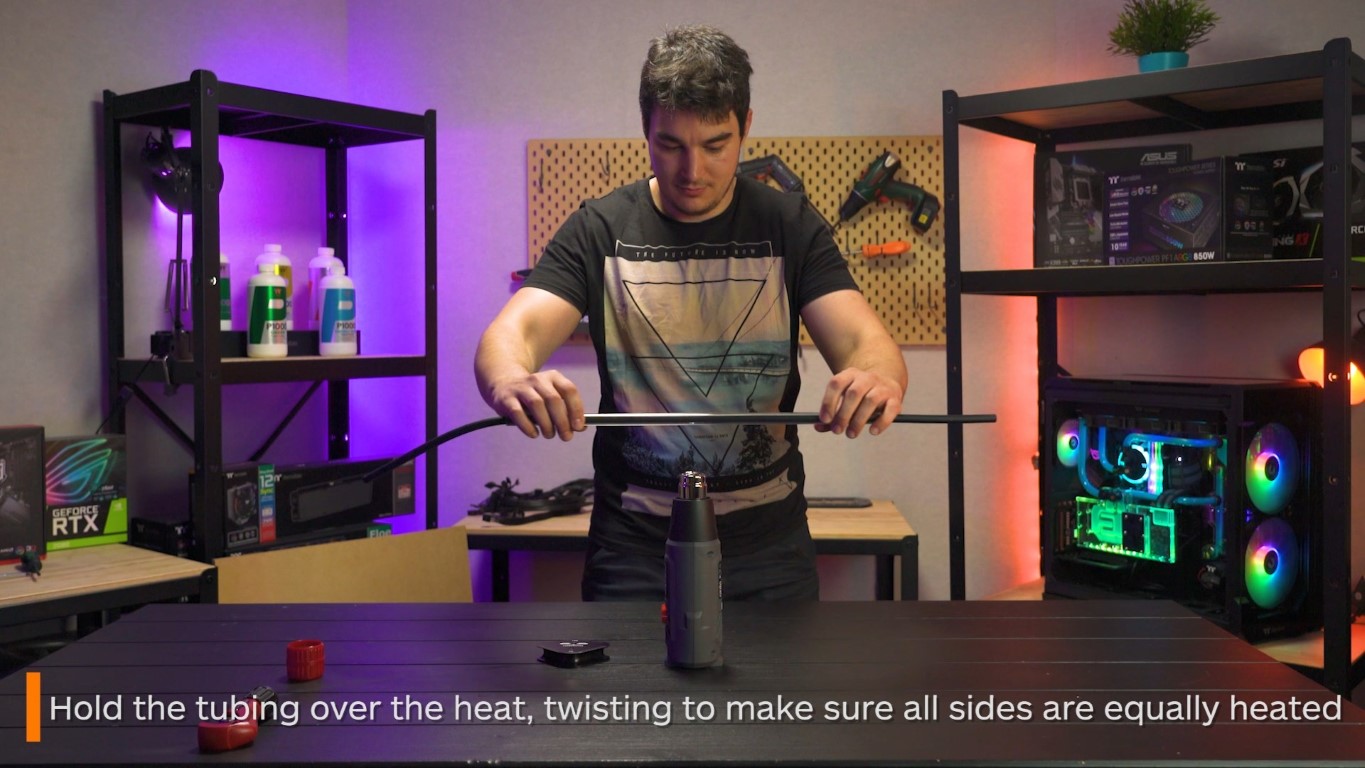
4. As it gets softer, gradually start bending the tube and work slowly over the heat until you’re confident it feels malleable enough to bend fully.
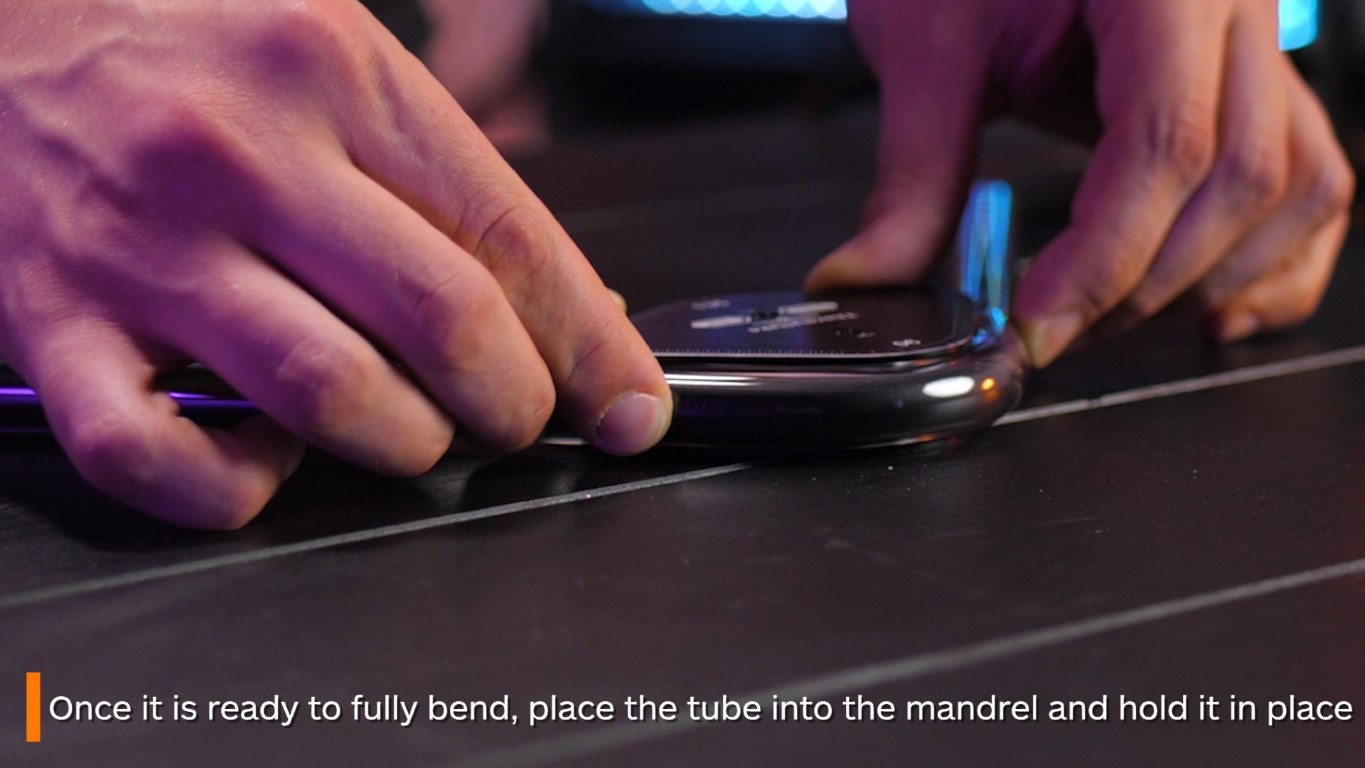
 5. If you’re bending with a mandrel, just bend it along the mandrel with the degree you want. Hold it there until it cools. Ensure you heat up a little more of the tube though when bending with mandrel, as they can be a bit finicky.
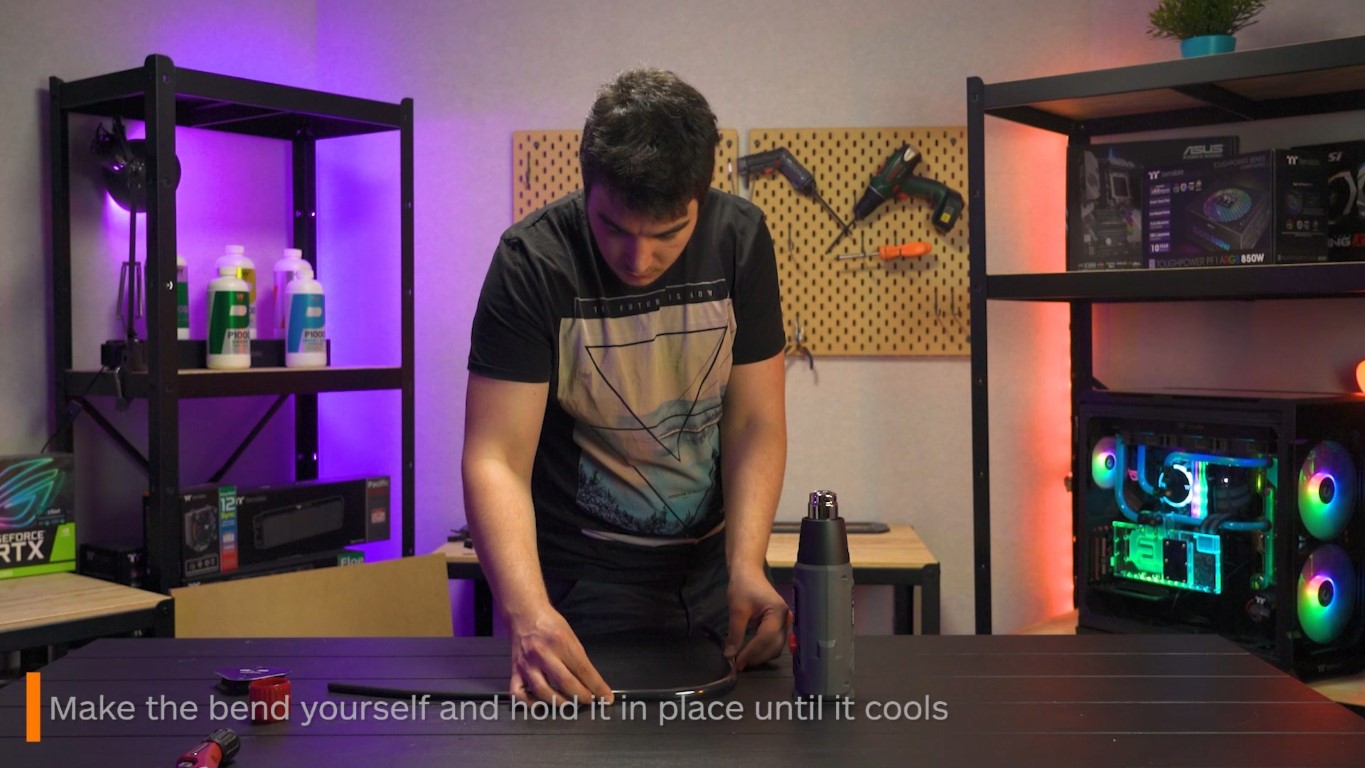
 6. If you prefer to bend free hand the process is basically the same. However, you just make the bend yourself, and again, hold it still until it cools.
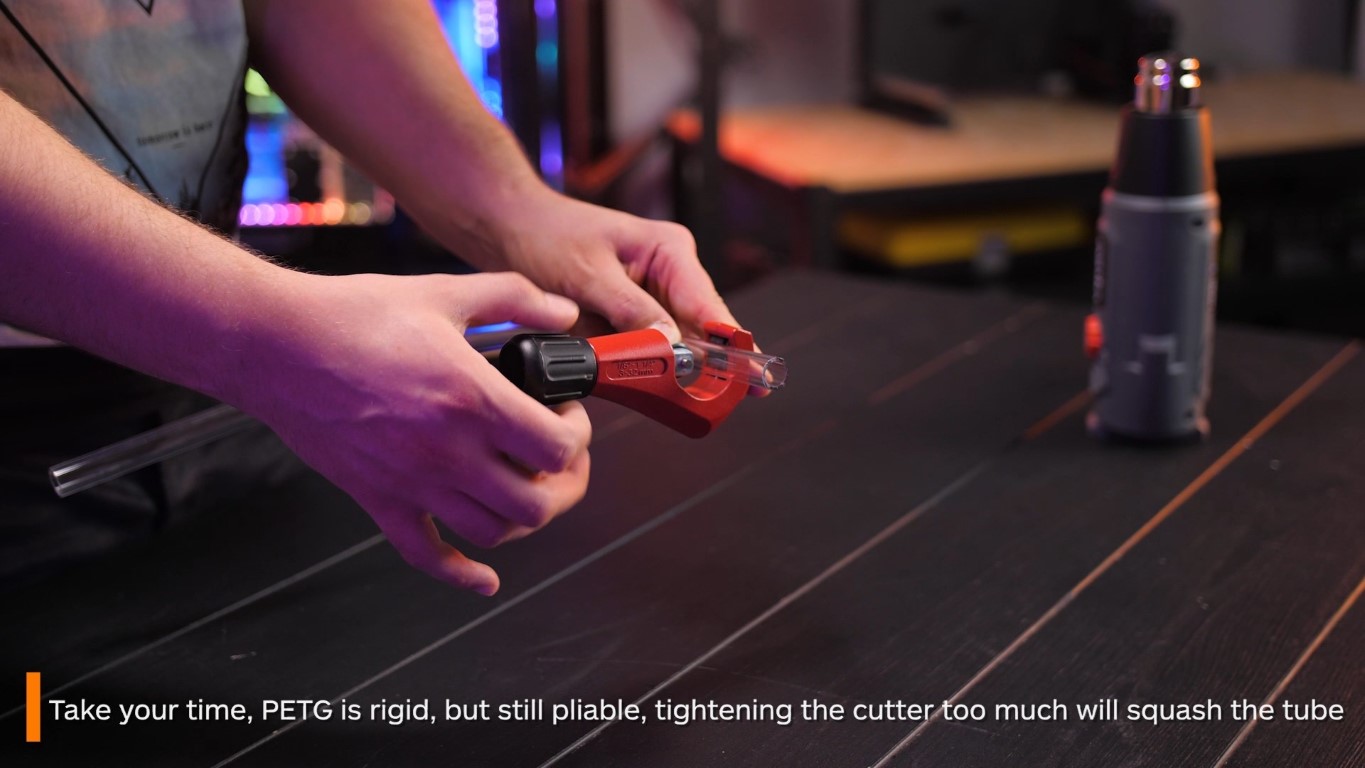
 7. Now it’s time to cut the edges off the tube, so grab your rotary cutter. Ensure to work slowly with it. PETG is rigid, but still pliable. If you close the cutter all the way, you will end up squashing the tube. So, ensure the blade is just touching the tubing, then do one rotation. Then twist the handle to extend the blade and do another rotation. By going slowly and taking your time, you won’t damage your tube and will produce a cleaner cut.
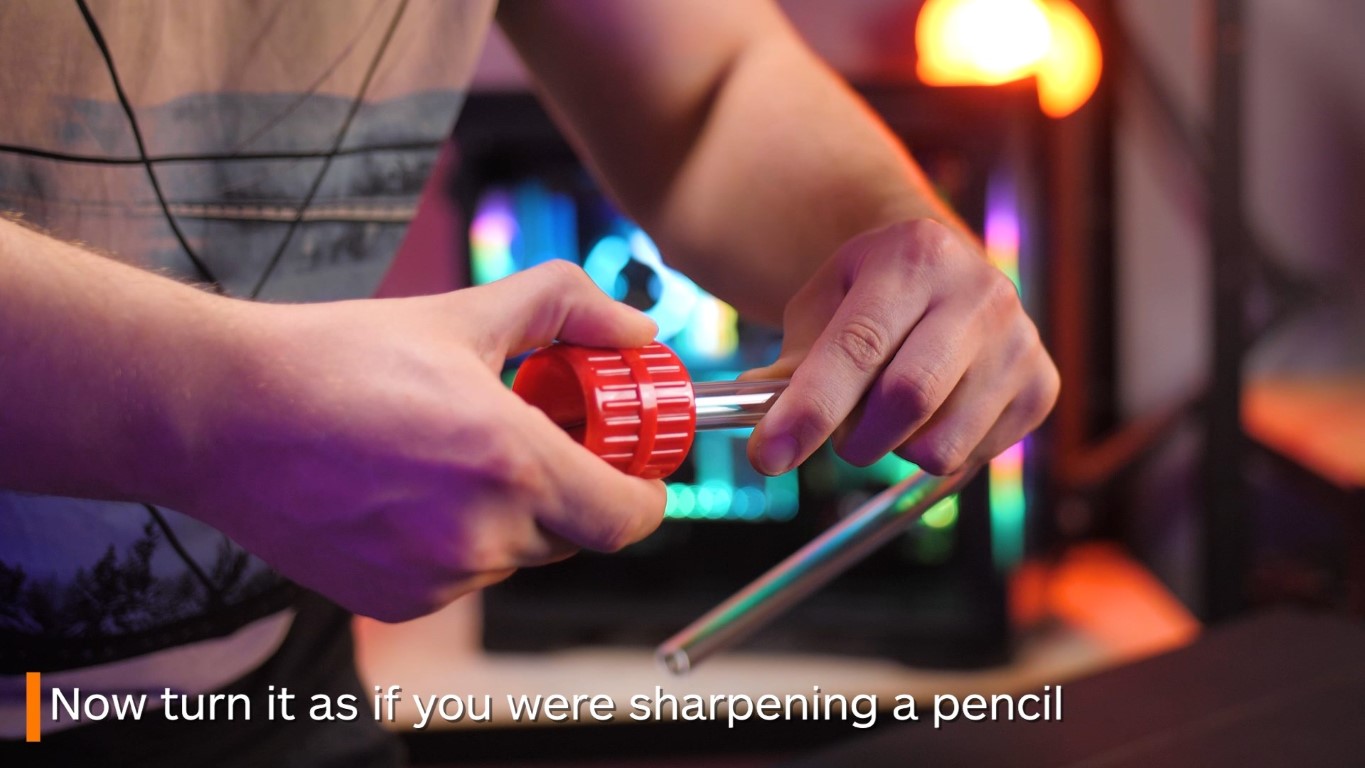
 8. Next tidy up the edges of the tubing with the reaming tool. Don’t worry about trying to give PETG tubing the 45-degree angle, as the tool likes to grab the tube and leave you with a slightly jagged edge. To clean the inside of the tube, place the reaming tool at the end of the tube and turn it, like you would when sharpening a pencil. Tap out the excess and you will have a clean end. If you skip this step, there is a risk of the small bits of tubing getting into your loop and getting stuck somewhere. If you don’t have a reaming tool, sandpaper can also work and can also give you a nice 45-degree edge on the outside.
 9. And that’s how to bend PETG tubing!
Now here is some quick examples of what not to do!
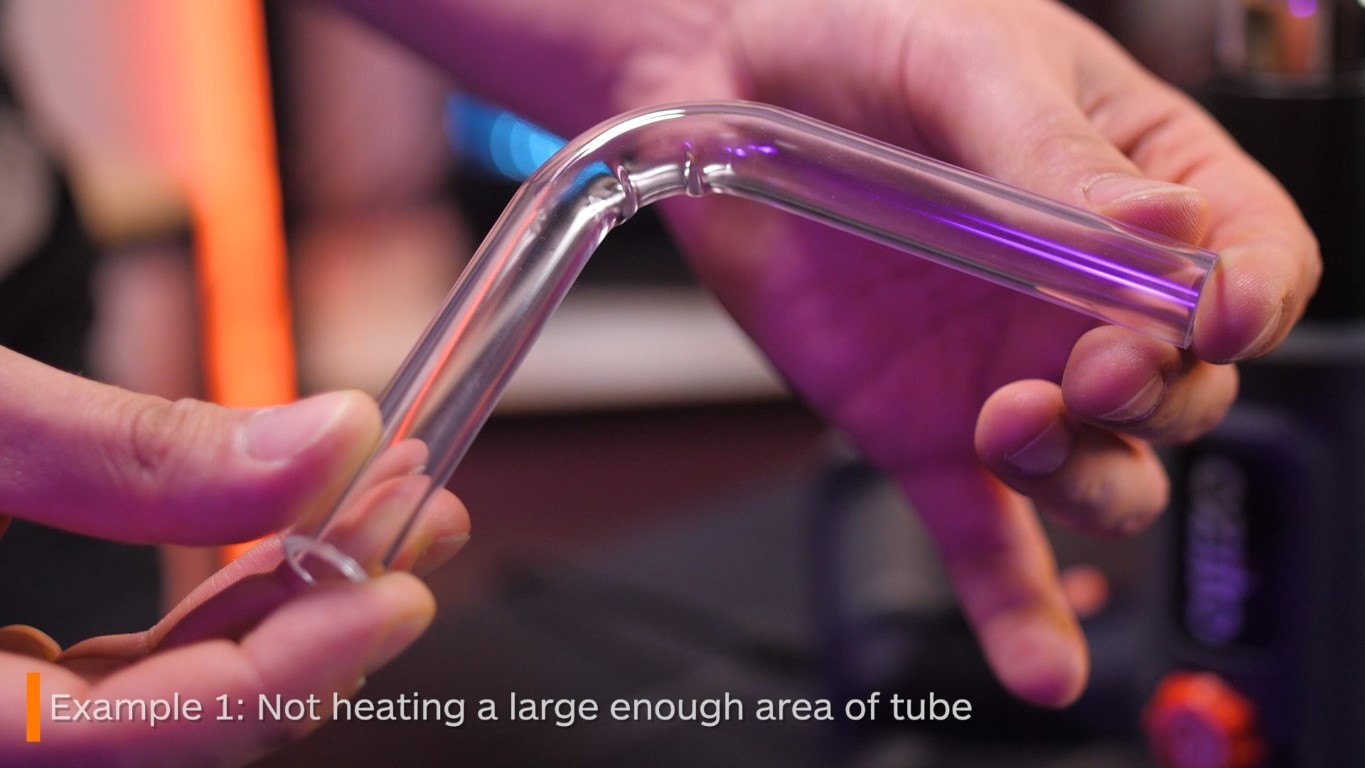
This example shows what happens if you only heat up a small area of the tube. As you can see, it kinks badly. You can technically still use this, but it won’t look great.
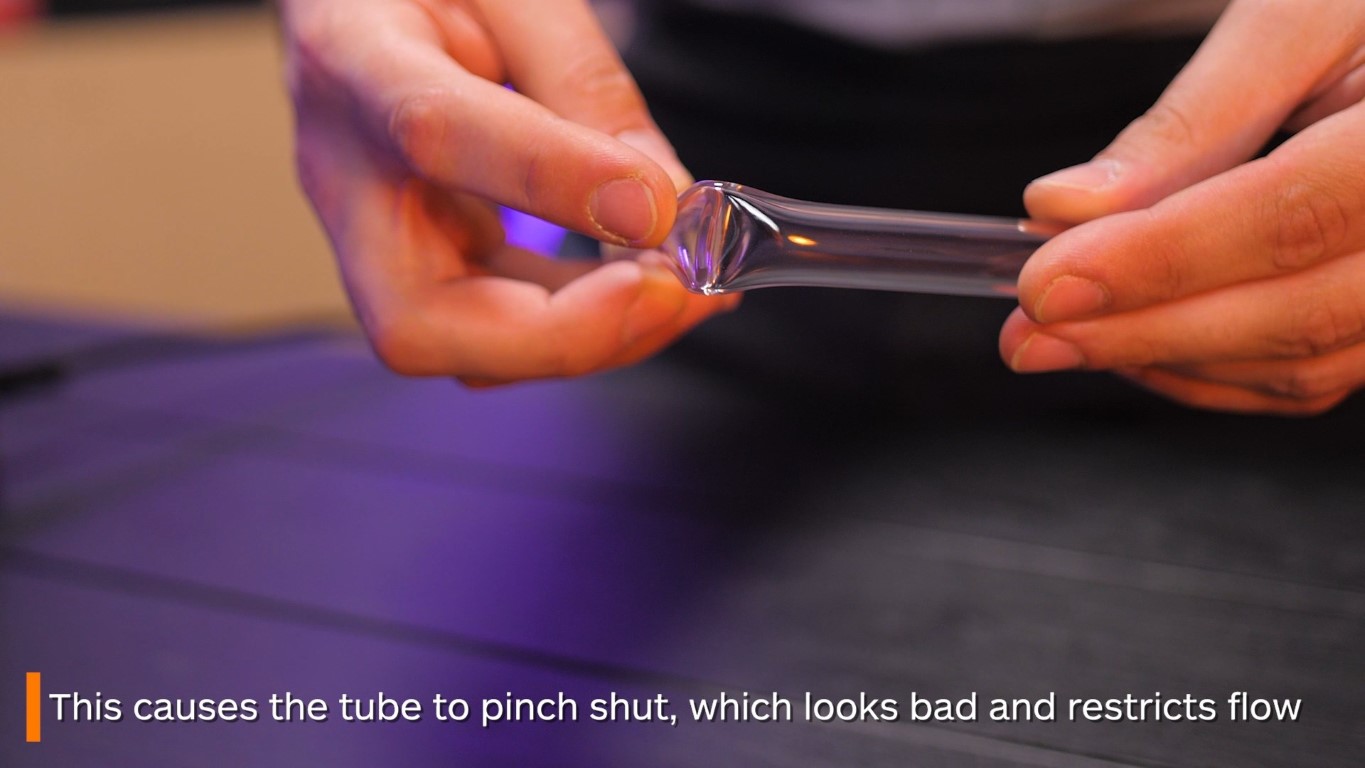
 This example shows you what will happen if you don’t use a silicone insert. As you can see, the tube is basically unusable now. Rigid tubing always needs a silicone insert!
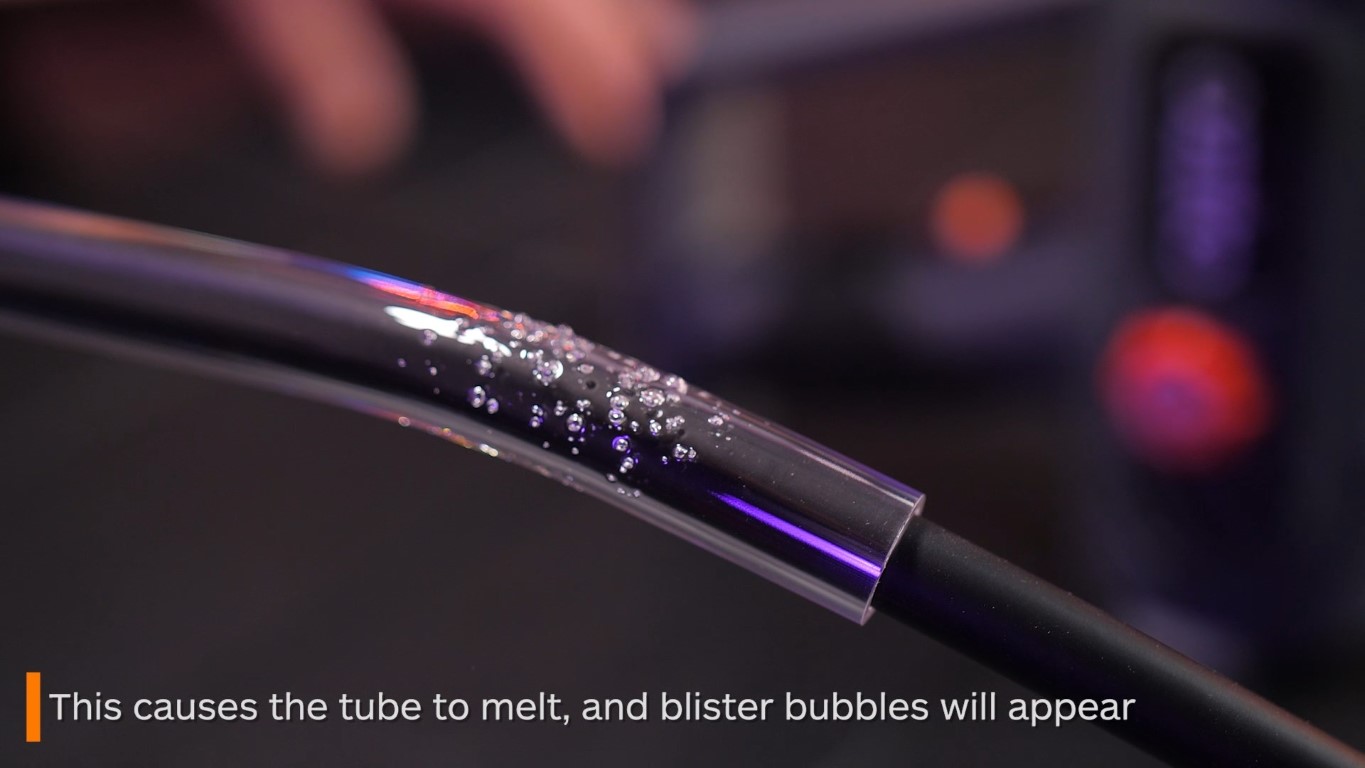
 The final example showcases what will happen if you overheat your tubing. As you can see, you basically will melt your tubing and it will bubble up. You technically can still use it if you’re desperate though, though we don’t recommend it.
 Best of luck with your tube bending! We believe in you!
Check out our other How-To posts here! Or watch our very own awesome tutorial on how to bend PETG tubing right here!